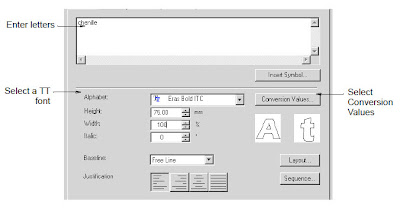
You can convert individual TrueType letters ‘on the fly’ and add them directly to a design through the Lettering tab of the Object Properties - Lettering dialog.
To convert individual TrueType letters
1. Right-click the Lettering icon.
The Object Properties - Lettering dialog opens.

2. Select a TrueType font from the Alphabet list.
3. Enter the text you want to embroider in the text entry panel.
Alternatively, type it directly on-screen after adjusting the conversion
settings.
Note : The more letters you enter, the more time needed to convert them.
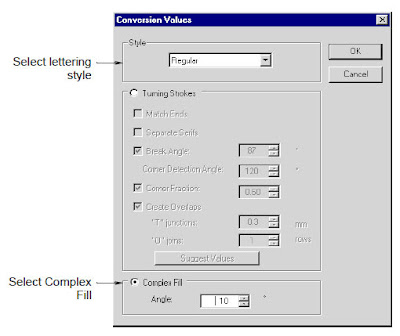
4. Click Conversion Values.
The Conversion Values dialog opens.

5. Select Complex Fill.
6. Enter the stitch angle.
7. Click OK to close.
8. Click the cursor entry point.
! If you have already entered text in the Lettering dialog, lettering
outlines are created directly.
! If not, type the letters on-screen and press Enter to create the
lettering outlines.
9. Select Stitch > Generate Stitches or press G.

10. Select the lettering object.
11. Select the Moss or Chain icon.
12. Select a stitch fill type, Straight, Perpendicular Fill or Island Coil.
13. Select the Compound Chenille icon.

To digitize letters with a different color border, see Adding a Compound Chenille border.


