When you select a machine format, Wilcom ES Chenille translates the commands that were applied during digitizing into machine functions that can be understood by the particular machine. If you select a Chenille template when opening a design, the machine format will default to your current machine. You can change the machine format for a design at any time. Finished designs can be sent direct to Melco's CH1 chenille machine, or stitched on Tajima and Barudan chenille machines.
This section describes how to select a machine format for a design, output it in other formats, and customize machine formats to meet your machine’s requirements.
Selecting machine formats

When you create a design, you need to select an embroidery machine format for it. You can change the machine format for a design at any time.
Note : You do not need to change the design’s native machine format in order to output to a different machine type.
To select a machine format
1. Select Machine > Select Machine Format.
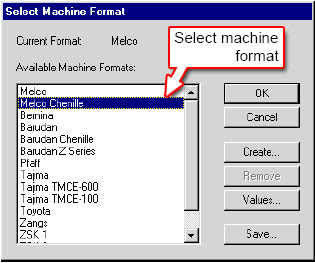
The Select Machine Format dialog opens.

2. From the Available Machine Formats list, select the required Chenille machine format.
3. To check the settings for the selected format, click Values.
4. Click OK.
Note : If a selected machine format does not support a particular function in the design — either automatically or manually inserted — it is simply ignored.


