To add automatic chenille fill
1. Select the Compound Chenille object.
2. Right-click the Compound Chenille icon.
The Effects > Compound Chenille tab opens
3. Select the Compound Chenille checkbox.

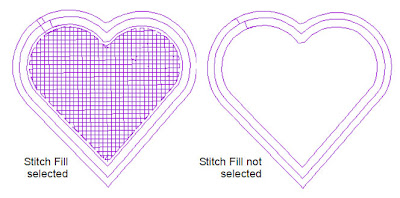
4. Select the Stitch Fill checkbox to fill the shape with stitches.
If it is cleared, the shape will not be filled.

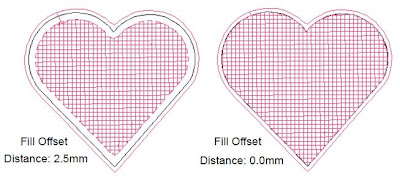
5. Enter a Fill Offset Distance.
Fill Offset Distance sets the distance between the digitized boundaries and the filled area.
It is always measured from the digitized boundary, not from the last Offset Moss or Chain stitch. Enter 0.0 mm to set the edge of the filled area on the digitized boundary. Enter a positive value to set the edge of the filled area inside the shape. Enter a negative value to set the edge of the filled area outside the shape.

6. Click OK.


